9 Drywall Repair Mistakes That Show Through Paint
The patching mistakes that become painfully obvious once the paint dries.
One of the most frustrating things about drywall repair is that a patch can look pretty good while you are working on it and then look terrible after the paint dries. I have repaired drywall for decades, and I can tell you that paint rarely hides a bad patch. In fact, paint usually makes the problem easier to see.
The goal is not to make the repair perfectly flat. Tape and joint compound add thickness, so you normally have to spread that thickness over a wider area until the change is too gradual for your eye to pick up. Most visible repairs come from getting that basic idea wrong—or from rushing one of the steps near the end. Here are nine mistakes to watch for.
1. Using too much mud
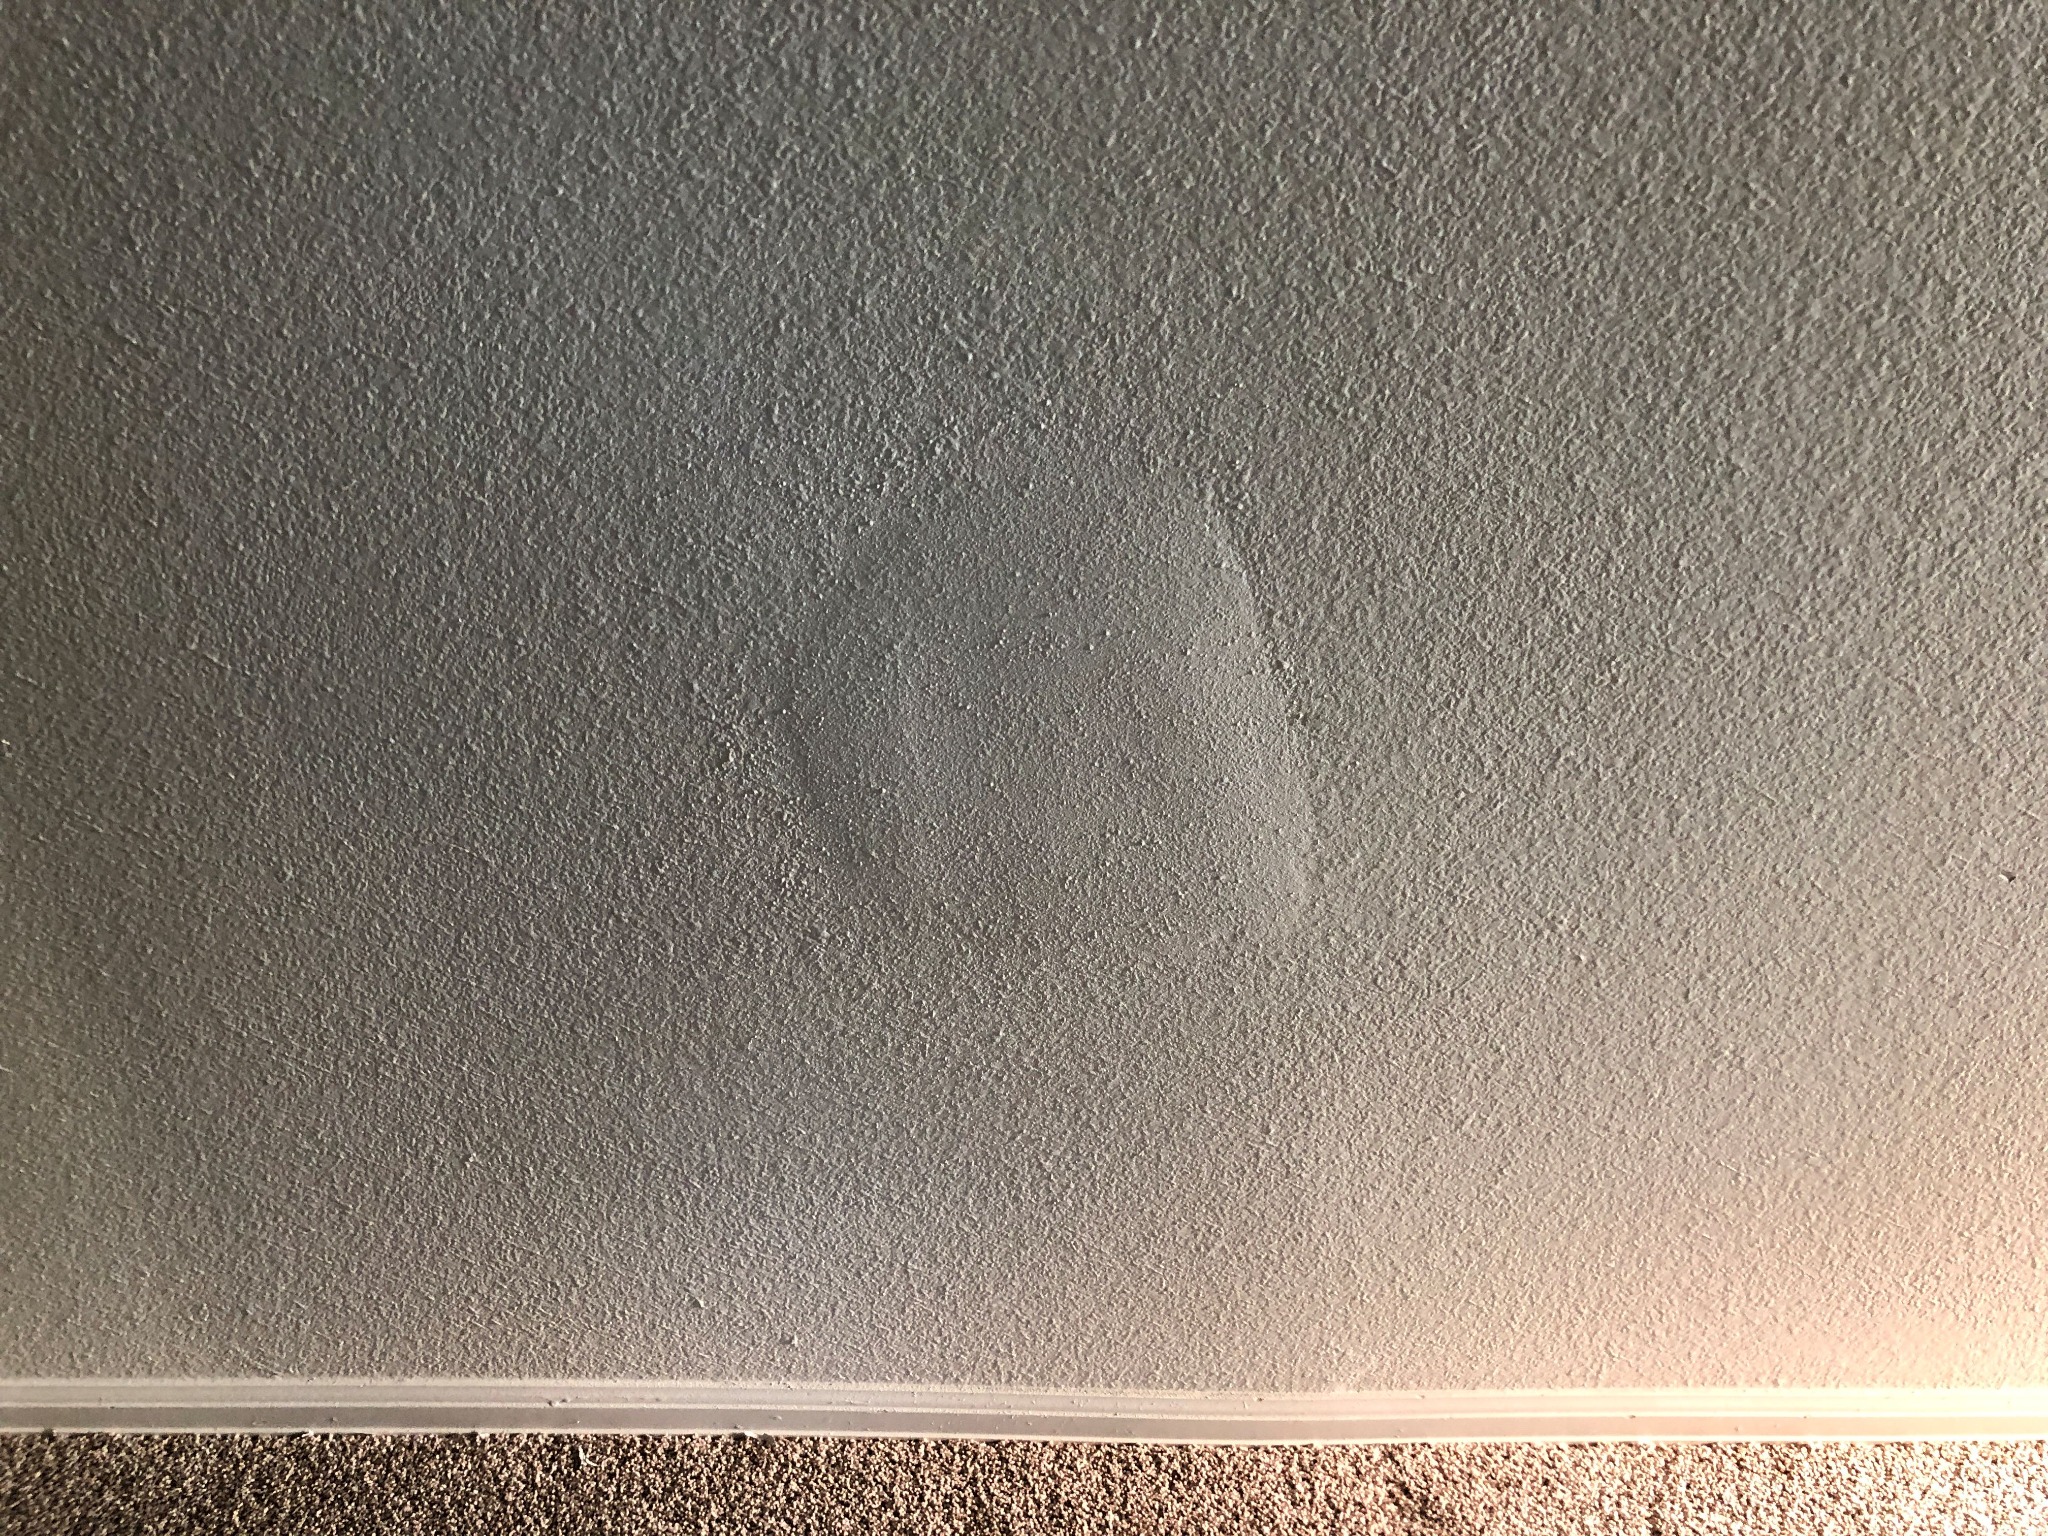
Beginners often assume that more joint compound will make the patch stronger or give them more material to sand smooth. What it usually gives them is a hump. The center of the patch may be solid, but when light travels across the wall, that hump casts a shadow and announces exactly where the repair is.
Apply enough compound to cover and fill what needs to be covered, but do not try to complete the repair with one heavy coat. Several controlled coats are easier to shape than one thick coat. I would much rather add a little more compound on the next pass than spend twenty minutes sanding off material that never needed to be there.
2. Rushing between coats
Ready-mixed joint compound dries by evaporation. The surface can turn white and feel firm while material underneath is still damp. If you recoat too soon, you can trap moisture, drag the earlier coat, or create shrinkage that shows up later. If you sand too soon, the compound may roll, gouge, or clog the sandpaper.
Drying time changes with temperature, humidity, airflow, and coat thickness, so the clock is only a rough guide. Look at the color, feel the surface, and pay attention to thick areas and inside corners. A fan can improve air movement, but blasting one small area with excessive heat can dry the surface unevenly.
3. Not feathering wide enough
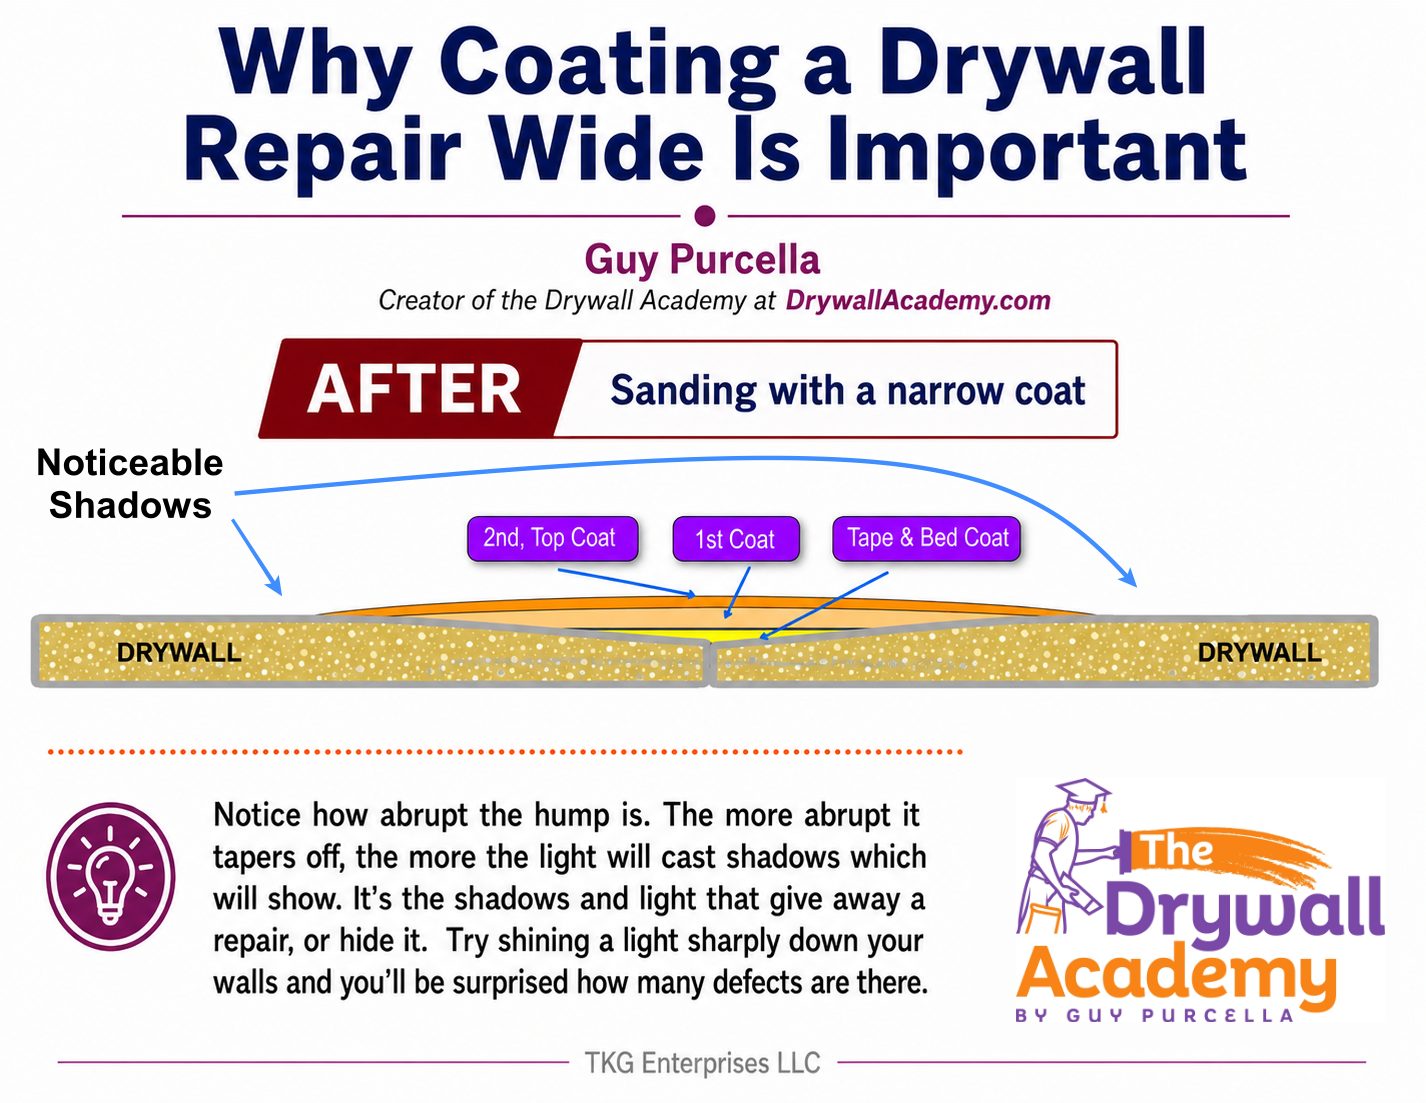
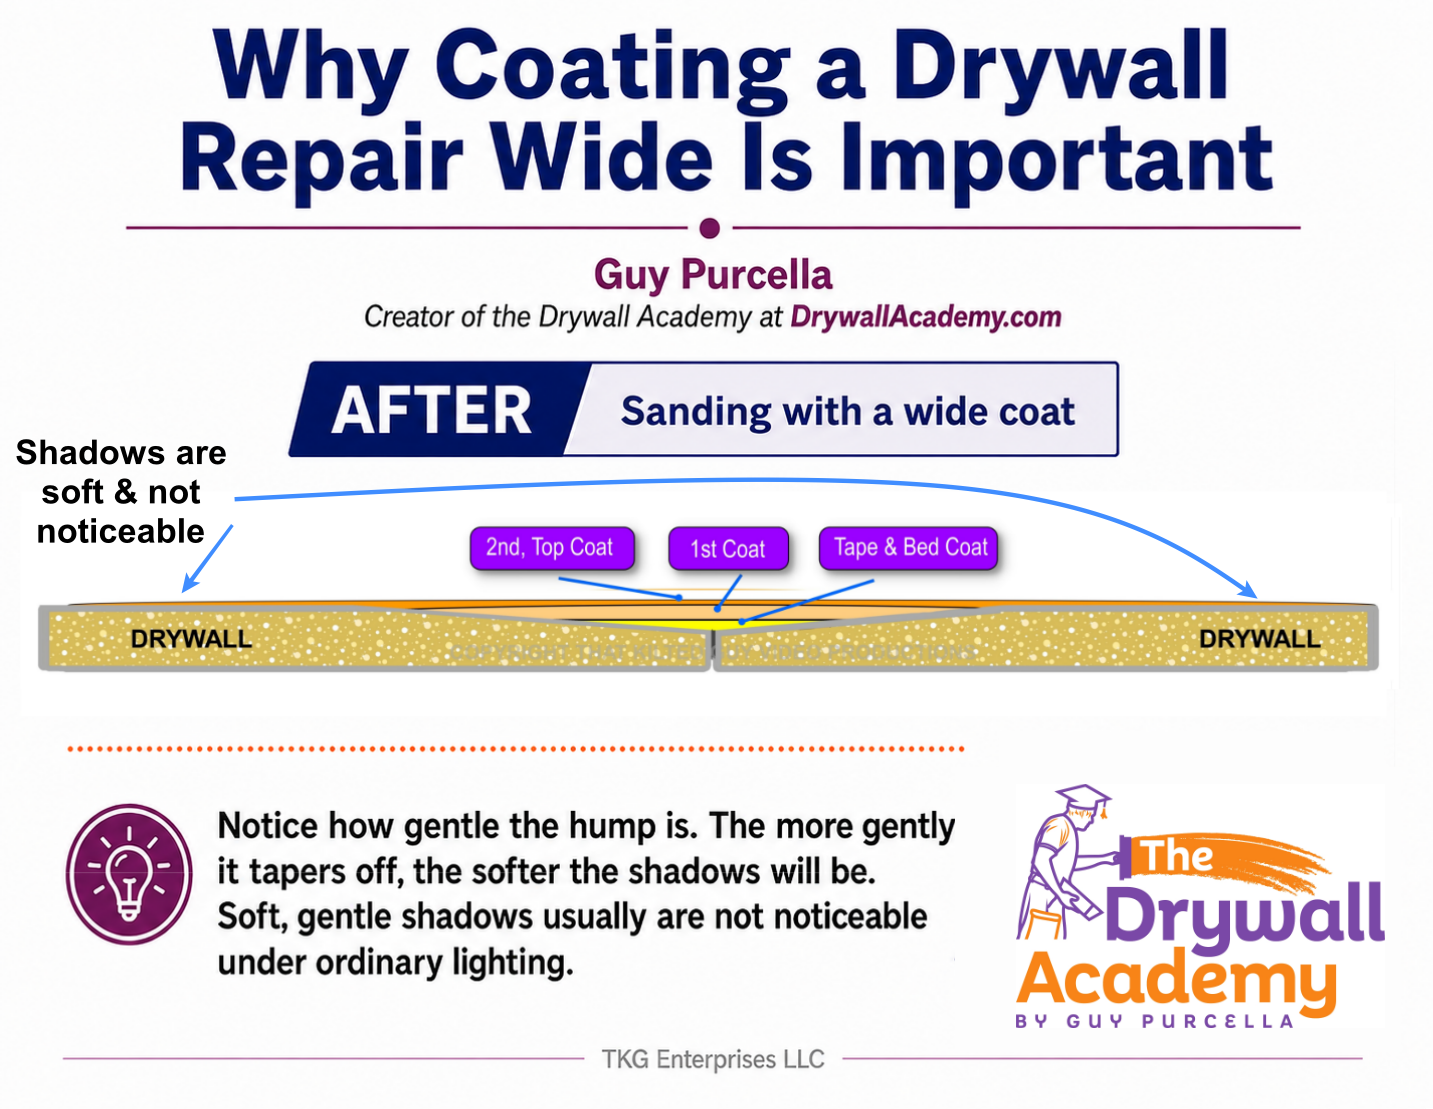
This may be the biggest difference between a patch that disappears and one that always looks patched. The tape and compound create a raised area. You hide that rise by making a long, gentle transition back to the original wall—not by keeping every coat tight to the hole.
Each coat should normally reach farther than the one before it. Apply some pressure to the outside edge of the knife so the compound becomes thinner as it meets the wall. On many repairs, going wider actually creates less sanding because the edges are already close to finished when the compound dries.
4. Over Sanding
Beginners often feel like they need to sand a repair until it's smooth and flat, and often end up oversanding. Then they pile on another coat and repeat the process.
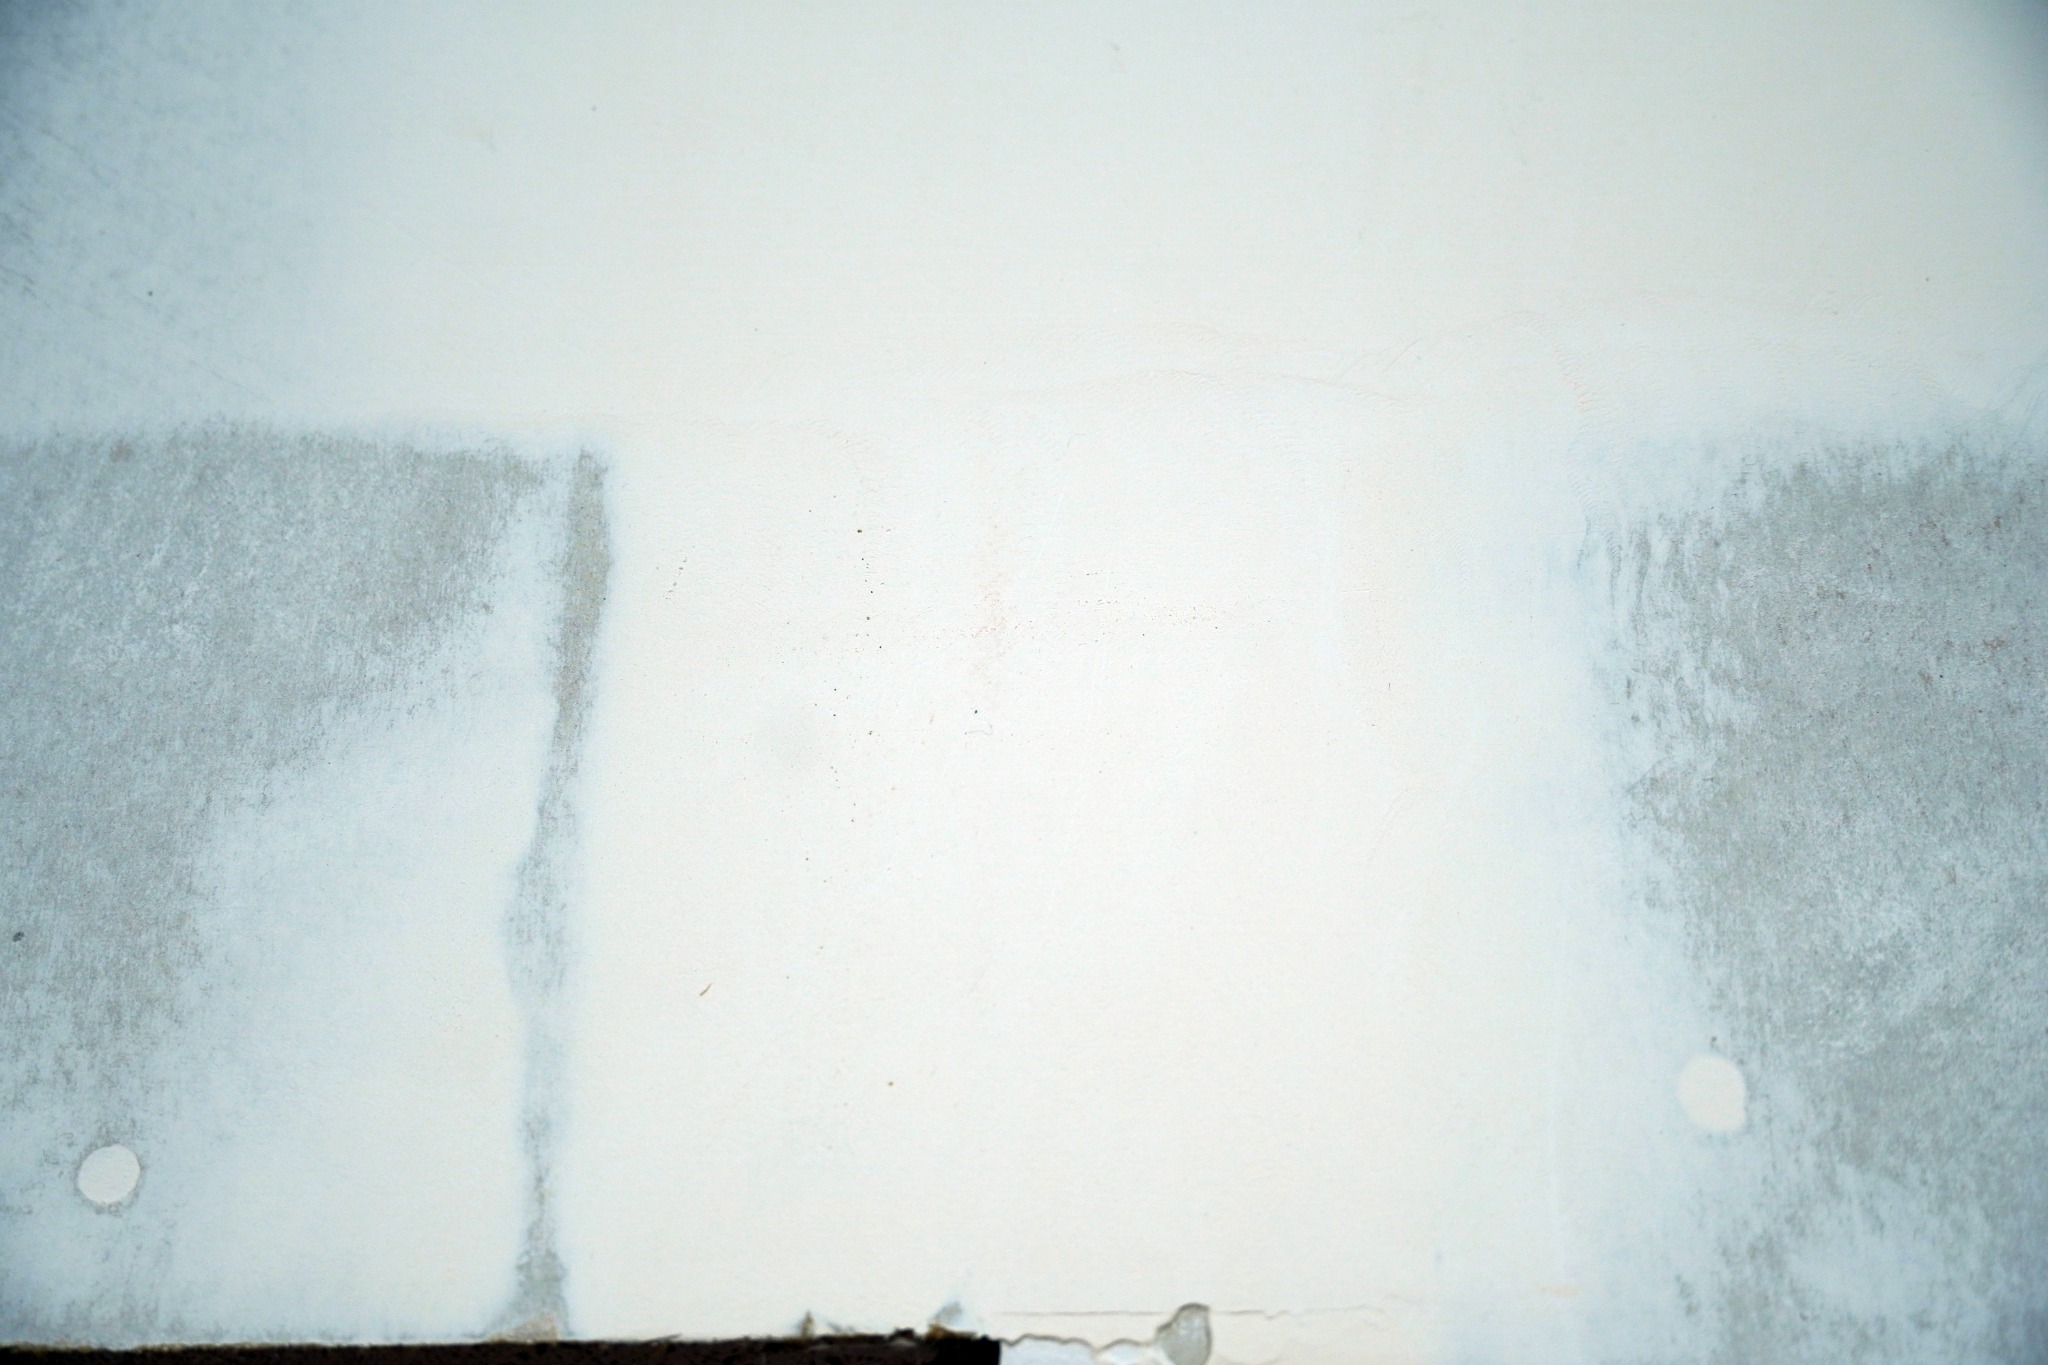
You want to sand just enough to smooth the outer edges and remove any excess hump you may have built up. But if you start seeing the joint tape come through, or the recessed edges of the drywall come through, you've oversanded. Those areas should be under a very thin, but mostly opaque layer of drywall mud, or they will telegraph back through the paint.
5. Using Sanding Screen
Sanding screen is great stuff when you need to sand aggressively and want the sanding media to last a long time. But if you use it for the final sanding instead of sandpaper, the scratches it leaves will often show through the paint.
I explain why and show you more sanding tricks and tips in my Drywall Academy at DrywallAcademy.com.
6. Damaging or ignoring torn drywall paper
Aggressive sanding can cut through the face paper, and removing old material can leave fuzzy brown paper behind. Once that paper is damaged, wet joint compound may cause it to swell or bubble. Smearing more mud over it without preparing it first often makes the repair worse.
Trim away loose fibers without digging into sound drywall, then seal the damaged paper with a product intended to lock down torn drywall paper before applying more compound. The exact repair depends on how deeply the face has been damaged, but the important point is to stop and stabilize the surface instead of trying to bury the problem.
7. Treating texture as an afterthought
A smooth patch on a textured wall is still going to look like a patch. Texture matching is not just choosing orange peel or knockdown. You also have to pay attention to the size, density, direction, and randomness of the existing pattern.
Practice on scrap drywall or cardboard before spraying the wall. Adjust the pattern there, let a sample dry if necessary, and then blend lightly beyond the repair instead of stopping at a hard square edge. Texture can disguise tiny differences, but it will not hide a high or poorly finished patch.
8. Skipping primer
Joint compound and drywall paper do not absorb paint the same way as an already-painted wall. If you paint directly over a repair, the sheen can flash, meaning the patched area looks duller or shinier even when the color matches.
Prime the completed repair and allow the primer to dry before judging the surface. Primer helps equalize porosity, but it is not a magic filler. If a ridge, pinhole, or scratch is visible after priming, fix it before the finish paint goes on. That is much easier than hoping another coat of paint will hide it.
9. Inspecting only from straight in front
Normal room light can be very forgiving. Then the sun comes through a window at the wrong angle and every ridge suddenly appears. I use a bright work light held close to the wall so the light travels sideways across the surface. That low angle exaggerates defects while there is still time to correct them.
Look from several directions and run a clean hand lightly across the repair. Your fingers can often feel an edge your eyes miss. Do this after sanding and again after priming. A few extra minutes of inspection can save you from repainting the entire area.
The bottom line
A good drywall repair is built in stages: make it solid, keep the coats controlled, spread the transition wide enough, match the surface, prime it, and inspect it under harsh light. Do not judge the job by how it looks while the mud is wet. Judge it by whether the repair disappears after the final coat of paint.
See the technique in action
I have videos that show these techniques in real time. Use the tutorial finder to open the closest That Kilted Guy playlist and the tool list for your project.
Find the matching tutorialThese are only some quick tips to help you avoid common drywall repair mistakes. If you want more in-depth training, check out our courses at DrywallAcademy.com.